My MacBook Experience
Recently, I switched from my trusty Pixel 4 XL to an iPhone X. This is because I do not like Android's current direction in terms of UI and jumped ship to iOS. This phone is amazing and I am enjoying the simplicity of iOS.
I started joining various app communities on Discord and talking within them. After talking to a dev named Uttiya, I found that iOS app development seemed pretty interesting to get started with.
The only issue was that I needed a MacBook to do anything iOS related due to Xcode. This is a story of how I brought my MacBook server to life by repurposing my old MacBook with some ingenuity to get it running on the latest version.
The Virtual Machine
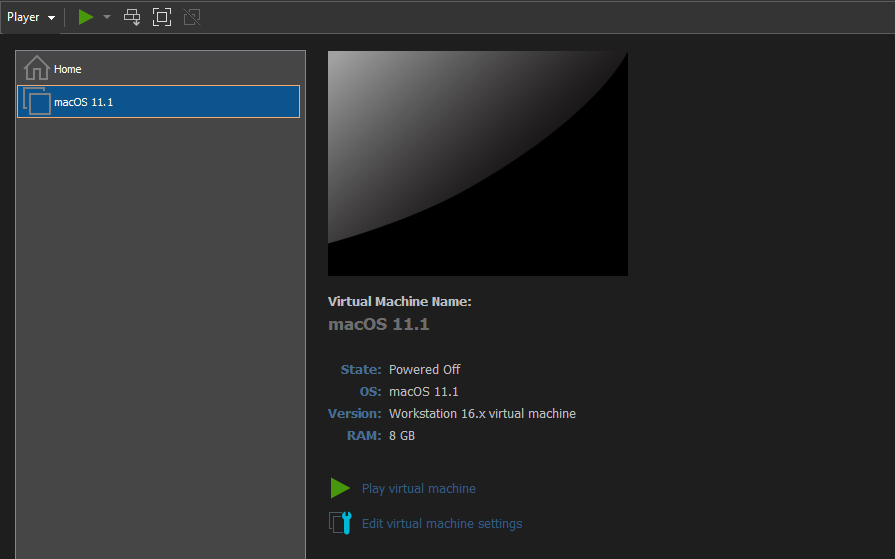
A person can use a MacOS virtual machine as opposed to buying a MacBook. However, I would heavily advise against this because of my personal experiences. I followed a guide to install MacOS on VMWare and it was a giant pain to get it working. My computer has WSL2 enabled because I use it for all of my development and Linux is a lot easier to work with compared to Windows. WSL2 uses Hyper-V to provide the minimal virtual machine for Linux to run.
The issue with this is that I cannot run a normal VM properly on an AMD cpu while Hyper-V is enabled. This led to the MacOS VM crashing every time I tried to launch it on my desktop.
I tried this on my laptop afterwards (which has an intel chip). After about 2 hours of painstakingly installing Big Sur and adding hardware acceleration, the VM still performed in a subpar state. Interaction with MacOS was painstakingly slow and made the machine unusable.
The Freshman Year Laptop
I actually owned a MacBook pro in freshman year since it made my high school computer class much easier (That class was a living hell). The only issue is that the MacBook is in my parents house and not my apartment so RIP me. Luckily, spring break was right around the corner and I was planning on going there anyways!
This MacBook is the mid 2012 pro version which I feel is the most upgradable out of all the MacBooks out there. The RAM isn't soldered, the disk drive is removable, and everything just works. I upgraded these specs back when I first got the computer because it was agonizingly slow.
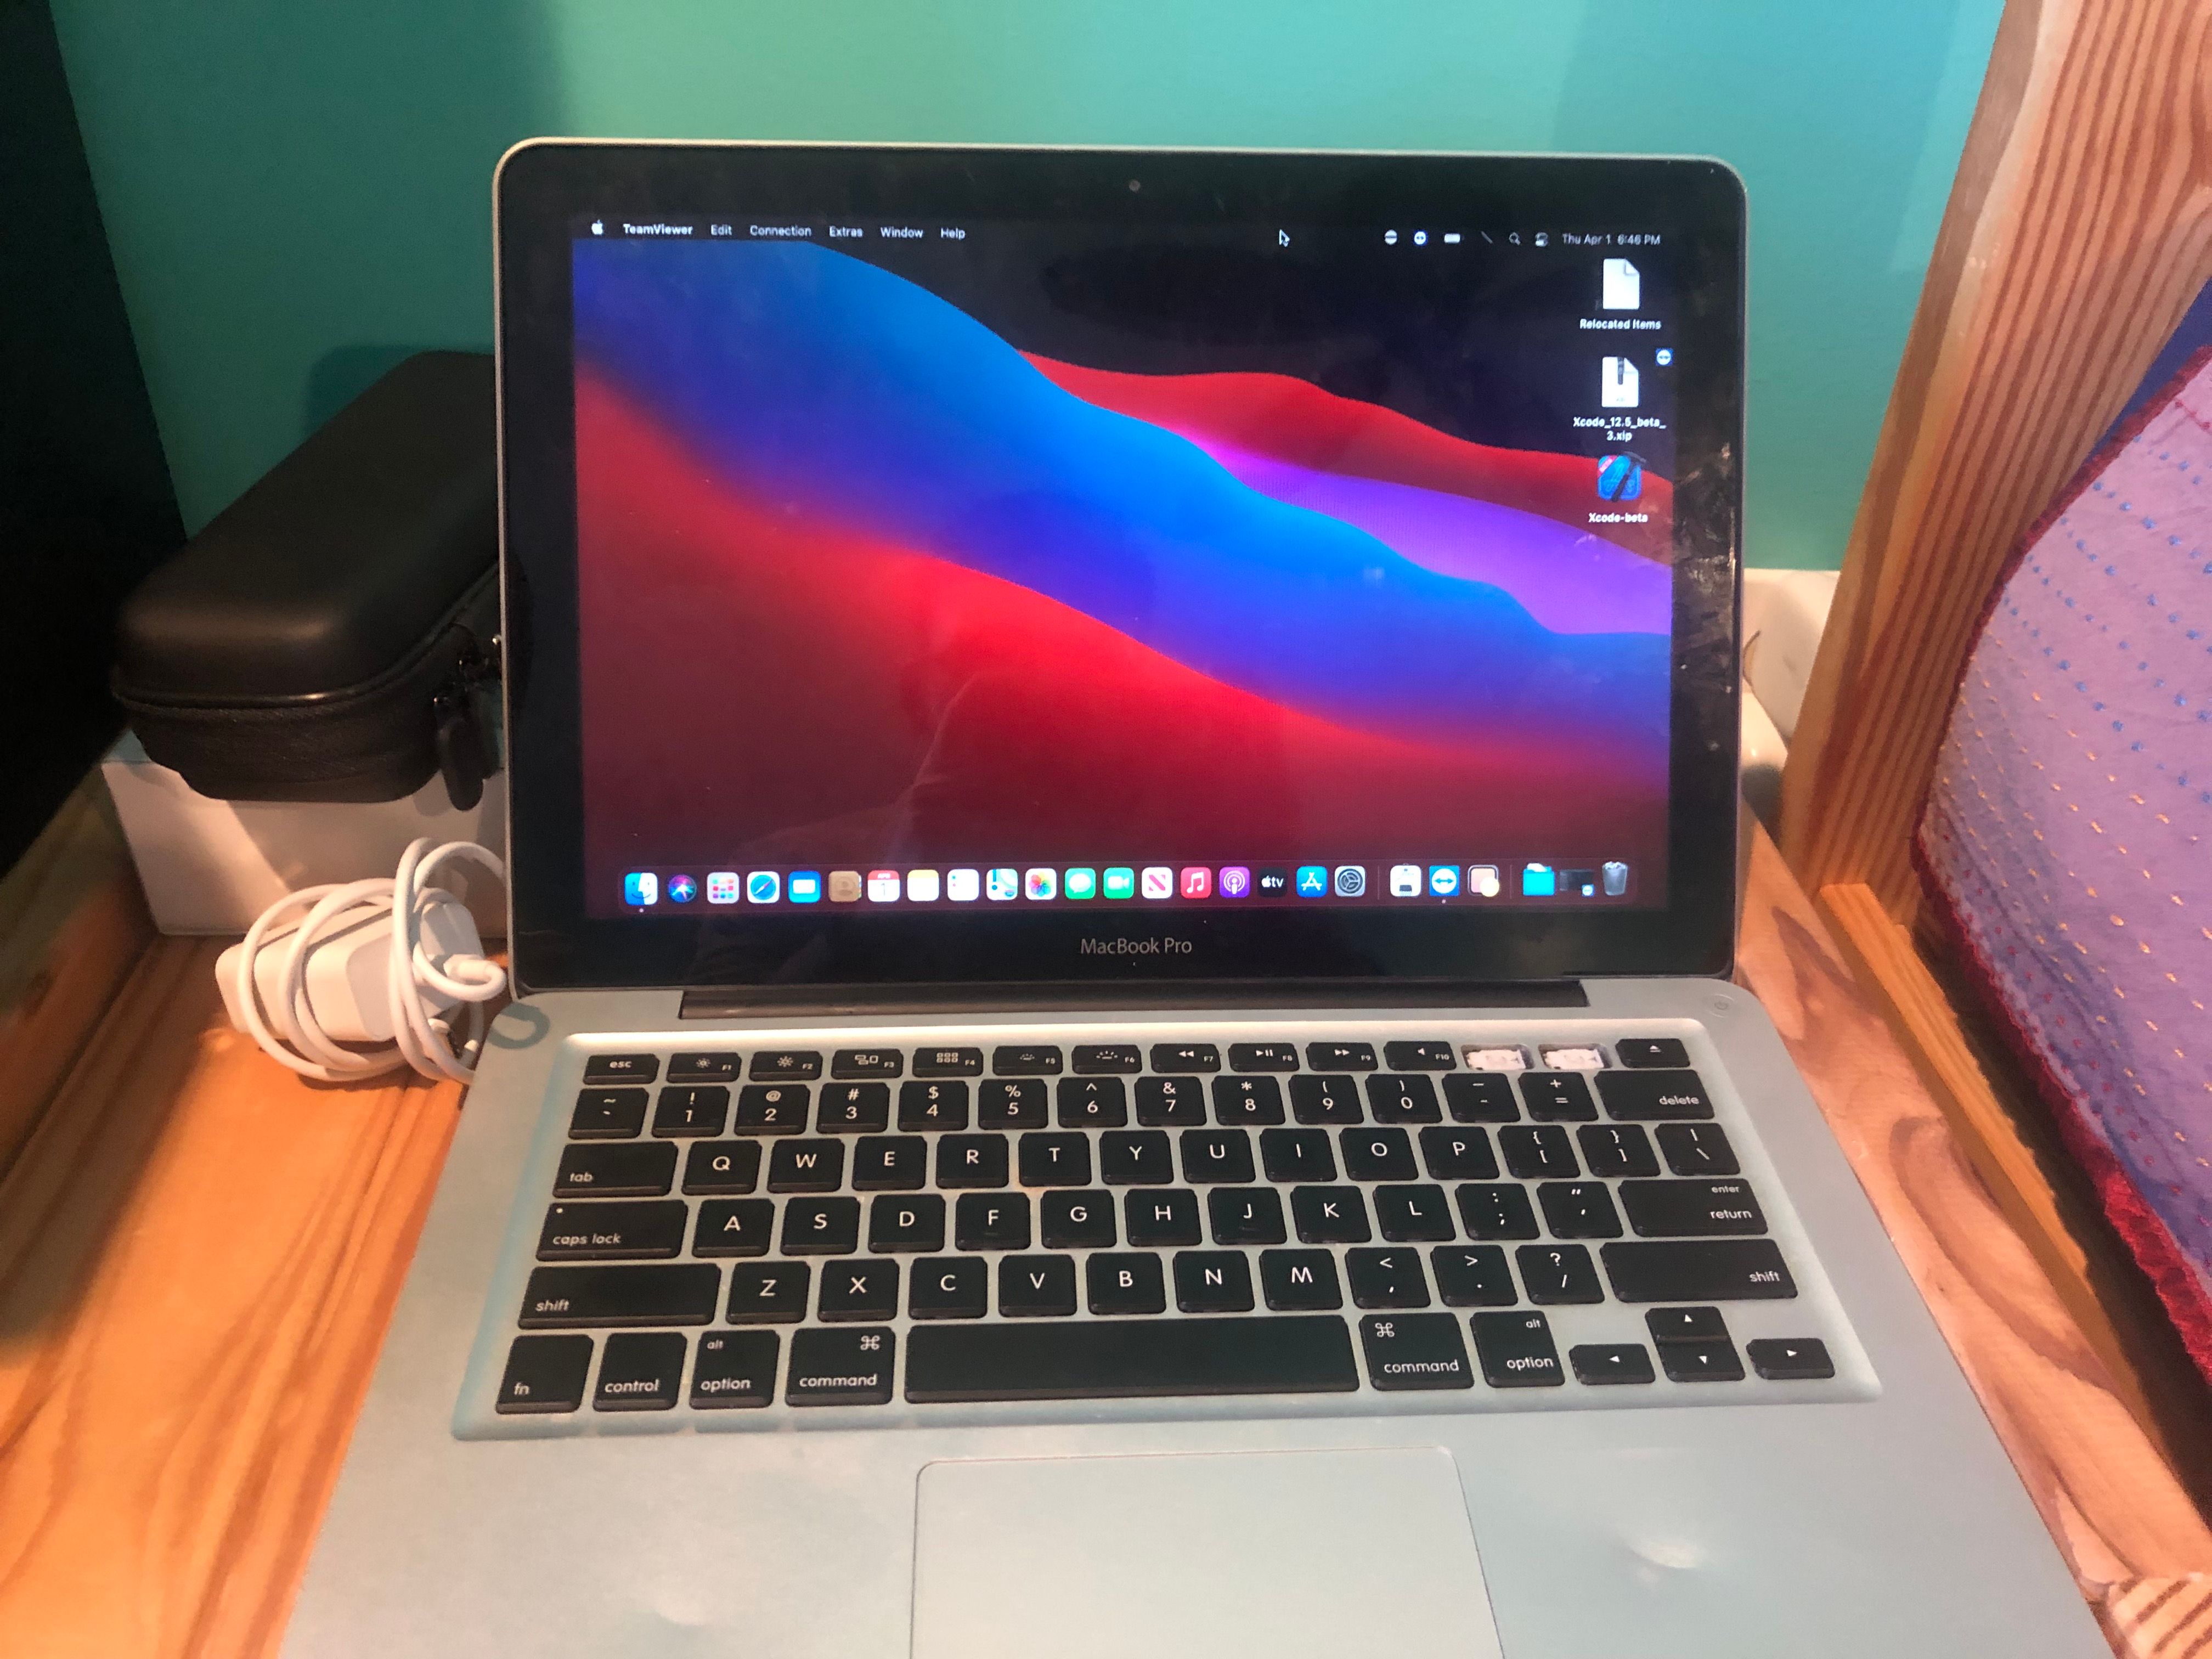
There was only one problem... The charger didn't work. It surely withstood the test of time, but being wrapped up for four years does take a toll on the charger's strength. I ended up paying $70 to get a new charger from Apple, but when I plugged the MacBook in, it worked without a hitch.
Migrating to Big Sur
Now, I am a person who likes my devices updated to the latest firmware so I'm not missing out on any cutting-edge features. Big Sur is a giant feature update and I wanted my MacBook on that software.
However, the mid 2012 MacBook pro had an end-of-life date on OSX 10.15 Catalina. Therefore, I could not upgrade my Mac through traditional channels. Other people also have this same issue, and it's a pretty easy fix.
In comes the patcher. I used this patcher which is a GUI application to make patching Big Sur onto my old MacBook easy.
The reason why I said the Mid 2012 MBP is the most versatile is because it's seamless with the patcher. I can run Big Sur just by running this app and no manual patches are required.
I had to do a few things before I could run the patcher though:
-
Completely clean my MacBook. Yes, this involved me looking through my freshman year self. I used this guide to completely format my laptop
-
Upgrade to OSX Catalina (The patcher wouldn't work without it)
-
Opened up the patcher and just followed the steps
After a few hours of waiting for that progress bar to stop moving, I FINALLY booted into Big Sur... Only to find that WiFi didn't work... Luckily, this is a known issue, and the post-install app from patched-sur instantly fixed it!
Installing Xcode
I already purchased a developer membership from Apple before doing this (for AltStore), so I installed Xcode from the app store and it worked like a charm!
Note: Later I tried building for iOS 14.5 beta (because my phone uses that version) and it turns out that I need the Xcode beta which supports iOS 14.5. I extracted the .xip file and my apps built successfully.
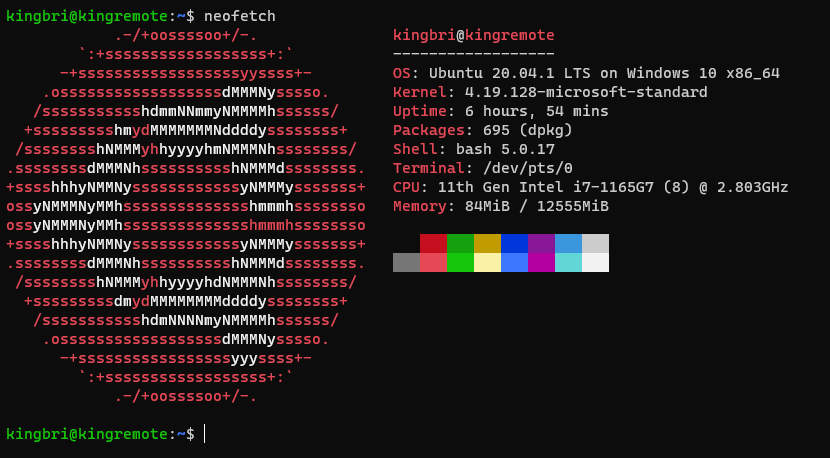
Remote Desktop?
Yes, I needed to remote into this MacBook from my computer, because I am not typing code directly on that thing.
I need to fulfill two conditions before I could use my MacBook as a remote server
- A hosting client so I could remote in without any issues
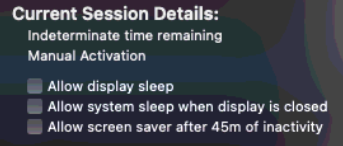
- A way to make my MacBook not sleep when the lid is closed
I tackled the second condition first since it was the easier of the two. There are actually apps that override the energy saver settings and make this option work. The one I used is called Amphetamine and after some configuration, closing my lid had no effect on making the MacBook sleep.
Now, for the first condition, I planned to use Parsec for remoting in. However, I quickly noticed that MacOS hosting is not possible with Parsec. I scoured the web for solutions, but the majority of them seemed really sketchy and did not provide me with what I wanted. Some of the options even cost a lot of money, which I did not want to pay.
Eventually, I settled on the tried and true method of TeamViewer. I put myself on the personal license (which is free) for both of my computers and it worked instantly.
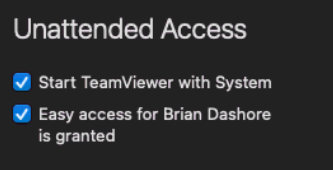
After creating an account, I had to do two things on the MacBook's end for a seamless connection:
- Enable Start TeamViewer with System
- Enable Easy access (Will require your computer and TeamViewer password)
Surprisingly, TeamViewer's latency is almost nonexistent and I can connect to my MacBook at any time. I'm also able to use Xcode without waiting for a long time to send a keypress. TeamViewer gets a thumbs up from me.
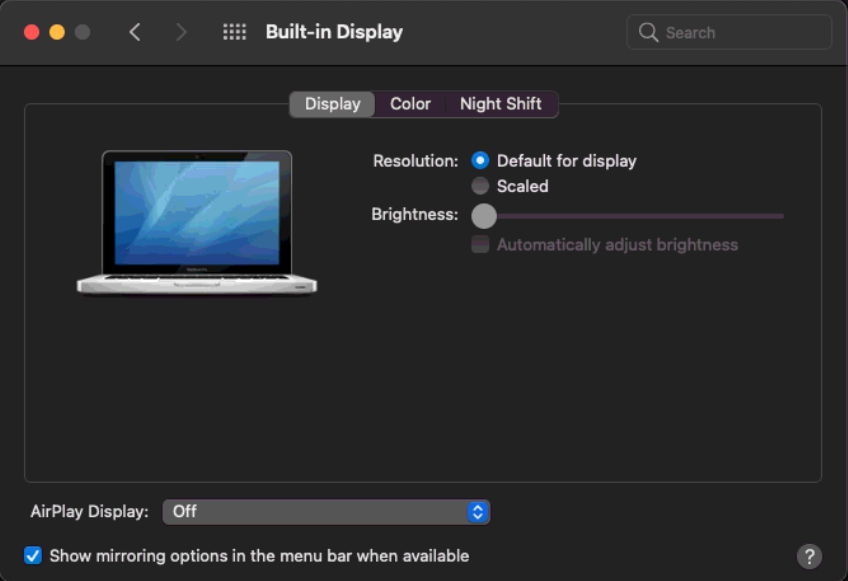
Another hassle was LCD burn-in. If the MacBook screen is always on, there will definitely be some burn in. Thankfully, the brightness options actually turn off the display when set all the way down.
Turning down the brightness fixed the issue and my Mac now has no risk of screen burn-in.
Make sure to uncheck the Automatically adjust brightness setting under display in System Preferences.
The Conclusion
That's my story on how I gave my old 2012 MacBook Pro some new life! Apple seriously makes products that can last for a long time.
Many people I know still have these old devices and have been working with them. I thought I'd work on my own. I am really proud of the result and I did not have to spend much money to get it working!
The cost would have been free if the charger still worked.
So, next time your friend wants to throw out a MacBook, ask if you can have it! Maybe you'll want to jump into iOS app development one day and will thank your past self.

By Brian Dashore